| Version 5 (modified by , 10 years ago) ( diff ) |
|---|
GENI Site Installation
Table of Contents
The site installation process has several major phases. The hardware setup establishes the wiring layout and switching requirements for nodes and the console. The nodes can be easily distinguished from the console by the number of Ethernet ports they have. Consoles require 4 ports and nodes only 3. All of the software setup is done on the console since the nodes have their operating system pushed onto them via the OMF imaging infrastructure that we are going to build on the console.
- Install hardware (add linsk here to ORBIT HW pages).
- Install the OS
- Install the OMF Services
- Configure and initialize LDAP
- Configure and test DNS/DHCP
- Configure and test xmpp
- Initialize Inventory
- Configure and test CMC
- Configure and test imaging
- Configure and test wimaxrf
- Check GENI account delegation
- Check GENI reporting
Attachments (5)
-
SWa.jpg
(30.2 KB
) - added by 10 years ago.
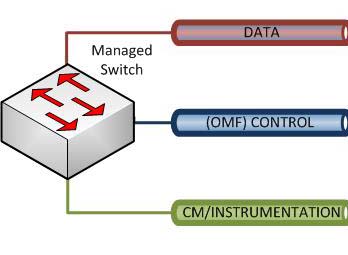
Switch Configuration A
-
SWb.jpg
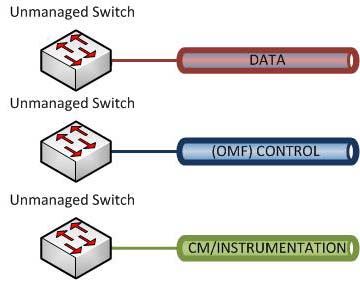
(35.3 KB
) - added by 10 years ago.
Switch Configuration B
-
SWc.jpg
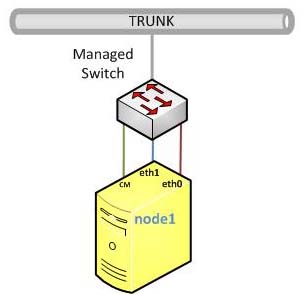
(31.8 KB
) - added by 10 years ago.
Switch Configuration C
-
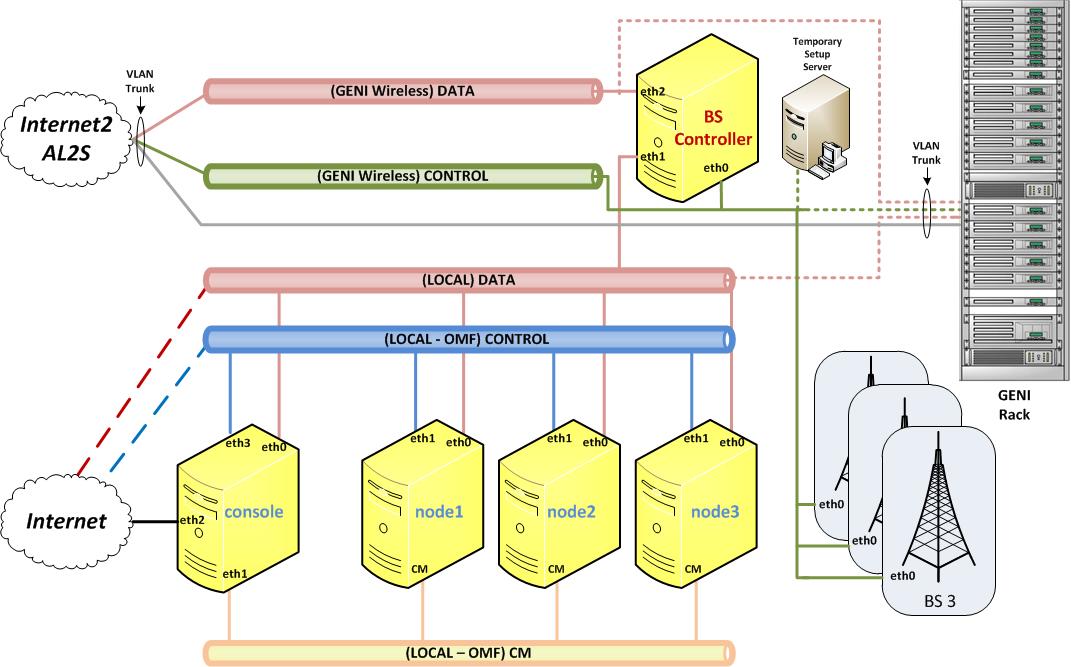
GENI Setup - big.jpg
(92.9 KB
) - added by 9 years ago.
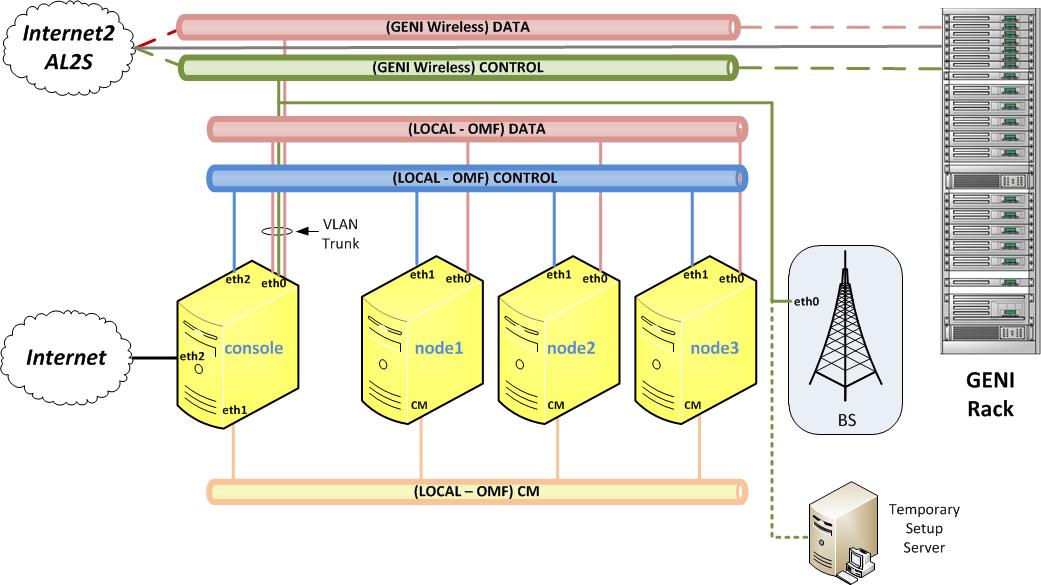
GENI site with dedicated basestation (BS) controller
-
GENI Setup - simple.jpg
(80.7 KB
) - added by 9 years ago.
Simple GENI setup with single Resource Manager (RM) node
Download all attachments as: .zip
Note:
See TracWiki
for help on using the wiki.