| Version 11 (modified by , 12 years ago) ( diff ) |
|---|
3.2 Airspan Air4G Basestation Hardware
3.2 Site Hardware Installation Instructions
The Instructions in the Airspan Installation Guide (shipped with airspan BS) talk about the process of Installation. Here are some additional notes for the installation.
The antenna shipped with the installation is AW3008 sector antenna with CL-V-104 mounting kit from Alpha Wireless Ltd..
Measure the distance between the mount point for the Airspan base station(BS) and the closest network connection for provisioning the BS.
The following parts are needed for installation:
1. 370+ W Power supply Even though Airspan 2.X Ghz operation has a maximum consumption of 370 Watts, -48V power supply rated for 450W is suggested. One candidate is Mean Well SE-450-48. 2. Power cable with custom connector (shipped with airspan BS) This power cable is an unearthed DC cable and is approx 75 feet long. If that is long enough, it should be attached to the power supply as shown in figure 1; in case longer cable is needed, use an off the shelf 18AWG 3C cable and solder it together to reach the power source.
3. Appropriate length weatherproof CAT5E/CAT6 cable. Bulk cable candidate for outdoor use is Belkin Direct Burial Cable. Once cable is in place, Ethernet RJ45 connectors have to be placed at both ends; make sure that the Ethernet cable is passed through the "Weatherproof Ethernet connector" (shipped with airspan), before the head is put on.
If you use fiber for data connectivity, instead of copper Ethernet wire, you will need:
- Fiber couplerLC-LC
BS Basic Configuration
Air4G-W24 base station has a built in web based interface and default IP 192.168.0.100
Connect the Ethernet cable to a network switch. Configure the auxiliary PC with an IP address in the 192.168.0.xxx range (e.g. 192.168.0.xxx subnet 255.255.255.0). BS is configured to come up with a default address of 192.168.0.100; in order to reconfigure it, visit the web interface (192.168.0.100) with:
username: macromaxe
password: macromaxe
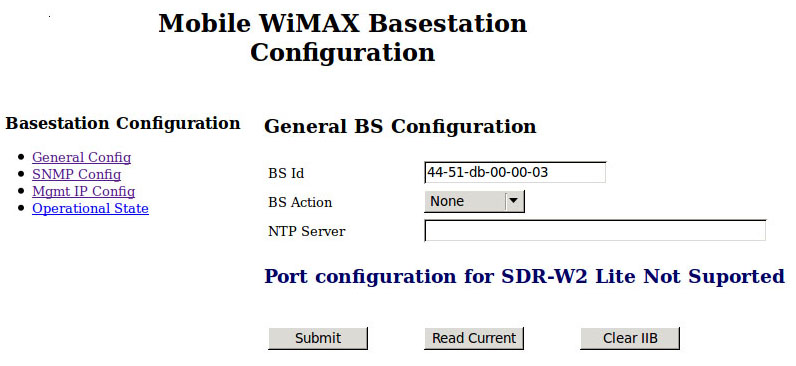
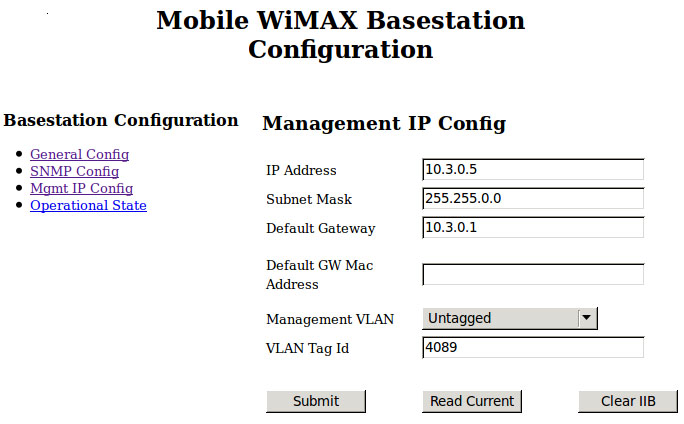
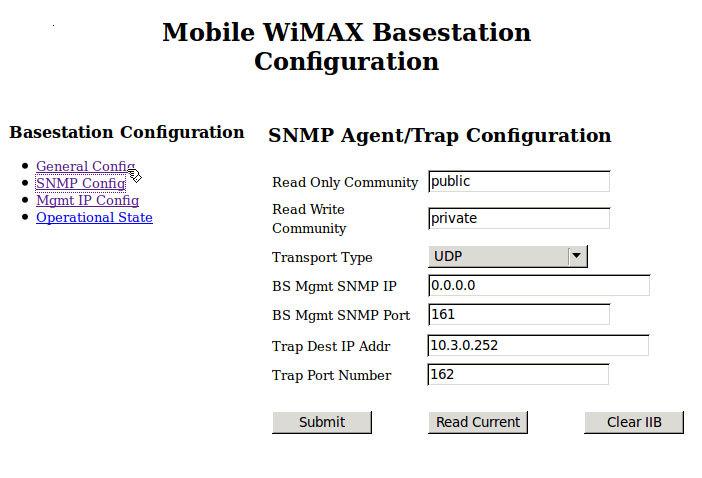
The setup consists of 3 screens which can be selected with the links on the left menu:
General Configuration: configure the BS Id with the combination of first three hex digits from the GENI OID and the last three based on your campus address assignment. 
SNMP Configuration: In addition to read and write community strings, one should specify trap destination IP address to match your controller IP address. 
Management IP Configuration: Enter controller PC IP address as well as subnet mask and IP address of the default gateway. Management VLAN support and corresponding VLAN should be also configured. NOTE: If using trunk to connect the BS, it is quite important to make sure that the switch port to which the BS is connected has appropriate handling for untagged packets (i.e. that it labels untagged packets with the management VLAN). 
3.3 Site Software Installation Instructions
The Instructions in the Airspan Installation Guide (shipped with airspan BS) talk about the process of Installation. The components for the software installation are:
- Netspan Management Software
- Netspan Software License
- Windows server 2008 Edition License to run the Netspan software
- Server/laptop to run Windows machine
The Airspan BS does not power ON by default .
Refer to Page 56 of Installation Guide in conjunction to these instructions.
Change the management IP and VLAN configuration to your site addressing scheme.
Contact seskar (at) winlab (dot) rutgers (dot) edu to initiate license acquisition for netspan.
Place the GPS device connected to Air4G-W24 in an area where it can obtain a Lock.
3.4 Netspan Installation Instructions
Follow directions for pre-reqs on NS.pdf
- Install SQL 2008 SP1 Express edition available at http://www.microsoft.com/en-us/download/details.aspx?id=26729
- Install .NET framework 4.0 http://www.microsoft.com/en-us/download/details.aspx?id=17851
- After Installing .Net Framework open cmd prompt on windows machine to register ASP.Net with IIS
cd %windir%\Microsoft.NET\Framework\v4.0.30319
aspnet_regiis.exe -i
- Install IIS as shown in the document
- Try running "InstallNetspanUSA.exe" to verify if database instance is visible to netspan
- If database is not available, check your SQL installation again.
- if database is visible in the dropdown menu, Choose
SQLEXPRESS2008 or whatever you named your instance
- At this point the "Installer" will complain that IIS management compatibility module is not installed". This is because Netspan is not able to read the system registry values.
- Modify system registry to allow netspan to read variables
1.  Open regedit from dos prompt.
2. In case of any unforeseen corruption issues, export the entire registry by
selecting the top node and using File->Export to export to a .reg file. Keep
it safe.
3. Navigate to SOFTWAREMicrosoftInetStpComponents node.
4. Use File->Export to export to another .reg file.
5. Modify this .reg file using notepad and replace
?SOFTWAREMicrosoftInetStpComponents? to
?SOFTWAREWow6432NodeMicrosoftInetStpComponents?
6. Save the file.
7. Now navigate to the node ?SOFTWAREWow6432NodeMicrosoftInetStpComponents?
8. Use right click menu and select permissions.
9. Click on ?Advanced? button.
10. Select the owner tab. You would notice current owner is TrustedInstaller.
11. Change the owner to Administrator, apply and click OK to close.
12. Select Administrator, and check ?Full Control?, click OK to close the
dialog.
13. Use File->Import to import the modified .reg file.
14. Verify the Components folder has registry entries now.
15. Make sure you are on the node
?SOFTWAREWow6432NodeMicrosoftInetStpComponents?
16. Use right click menu and select permissions.
17. Click on ?Advanced? button.
18. Select Administrator, and uncheck Full Control, click OK to close the
dialog.
- Launch the "Installer". The Pre-reqs should pass now. Follow the instructions on Page 20-21 to finish the installation.
3.5 Base Station Server
Linux server, equipped with two Ethernet NICs.
3.6 Virtual Machine Server
Linux server, equipped with two Ethernet NICs, each with two Ethernet interfaces.
KVM VMs installed.
3.7 OMF/OML Server
Linux server, equipped with two Ethernet NICs, each with two Ethernet interfaces.
KVM VMs installed? Ubuntu VMs installed?
3.7.1 Aggregate Manager VM
3.7.2 Experiment Controller VM
Attachments (5)
-
Air4gPS.jpg
(132.4 KB
) - added by 12 years ago.
Attaching Air4G Power Cable
-
A4GSNMPSetup.jpg
(91.6 KB
) - added by 12 years ago.
Air4G SNMP Configuration Page
-
A4GManagementSetup.jpg
(81.1 KB
) - added by 12 years ago.
Air4G Management Configuration Page
-
A4GGeneralSetup.jpg
(78.3 KB
) - added by 12 years ago.
Air4G BS General Configuration Page
-
backup_2012-09-28.xml
(199.7 KB
) - added by 12 years ago.
Airspan_Golden_config
Download all attachments as: .zip
